

A Royal Prince is rarely seen without his princess and loyal advisor.
You will need:
3.0mm Crochet hook
Yarn Needle
8ply yarn in any colours (minimal)
8ply yarn in secondary colour for belly patch
Cotton thread & needle (optional)
9mm Safety Eyes
A Glossary of Terms:
Pattern is written in US Terminology unless otherwise specified
Ch —> Chain
Slst —> Slip Stitch
SC —> Single Crochet
HDC —> Half-double Crochet
DC —> Double Crochet
TC —> Triple Crochet
INC —> Increase (Work 2 stitches into the same stitch to add one to the overall count)
DEC —> Decrease (crochet two stitches together to remove one fro the overall count)
MR —> Magic Ring (Work stitches into a tight circle)
This pattern is worked in the round, this means please don’t slip stitch at the end of the row to join, continue on in a spiral.
I generally will make all of the pieces and pin them in place before I attach anything, this is the best way for me personally to ensure I attach evenly and as symmetrically as I can.
The Frog Prince and his Retainers - Crochet Pattern
Before you start:
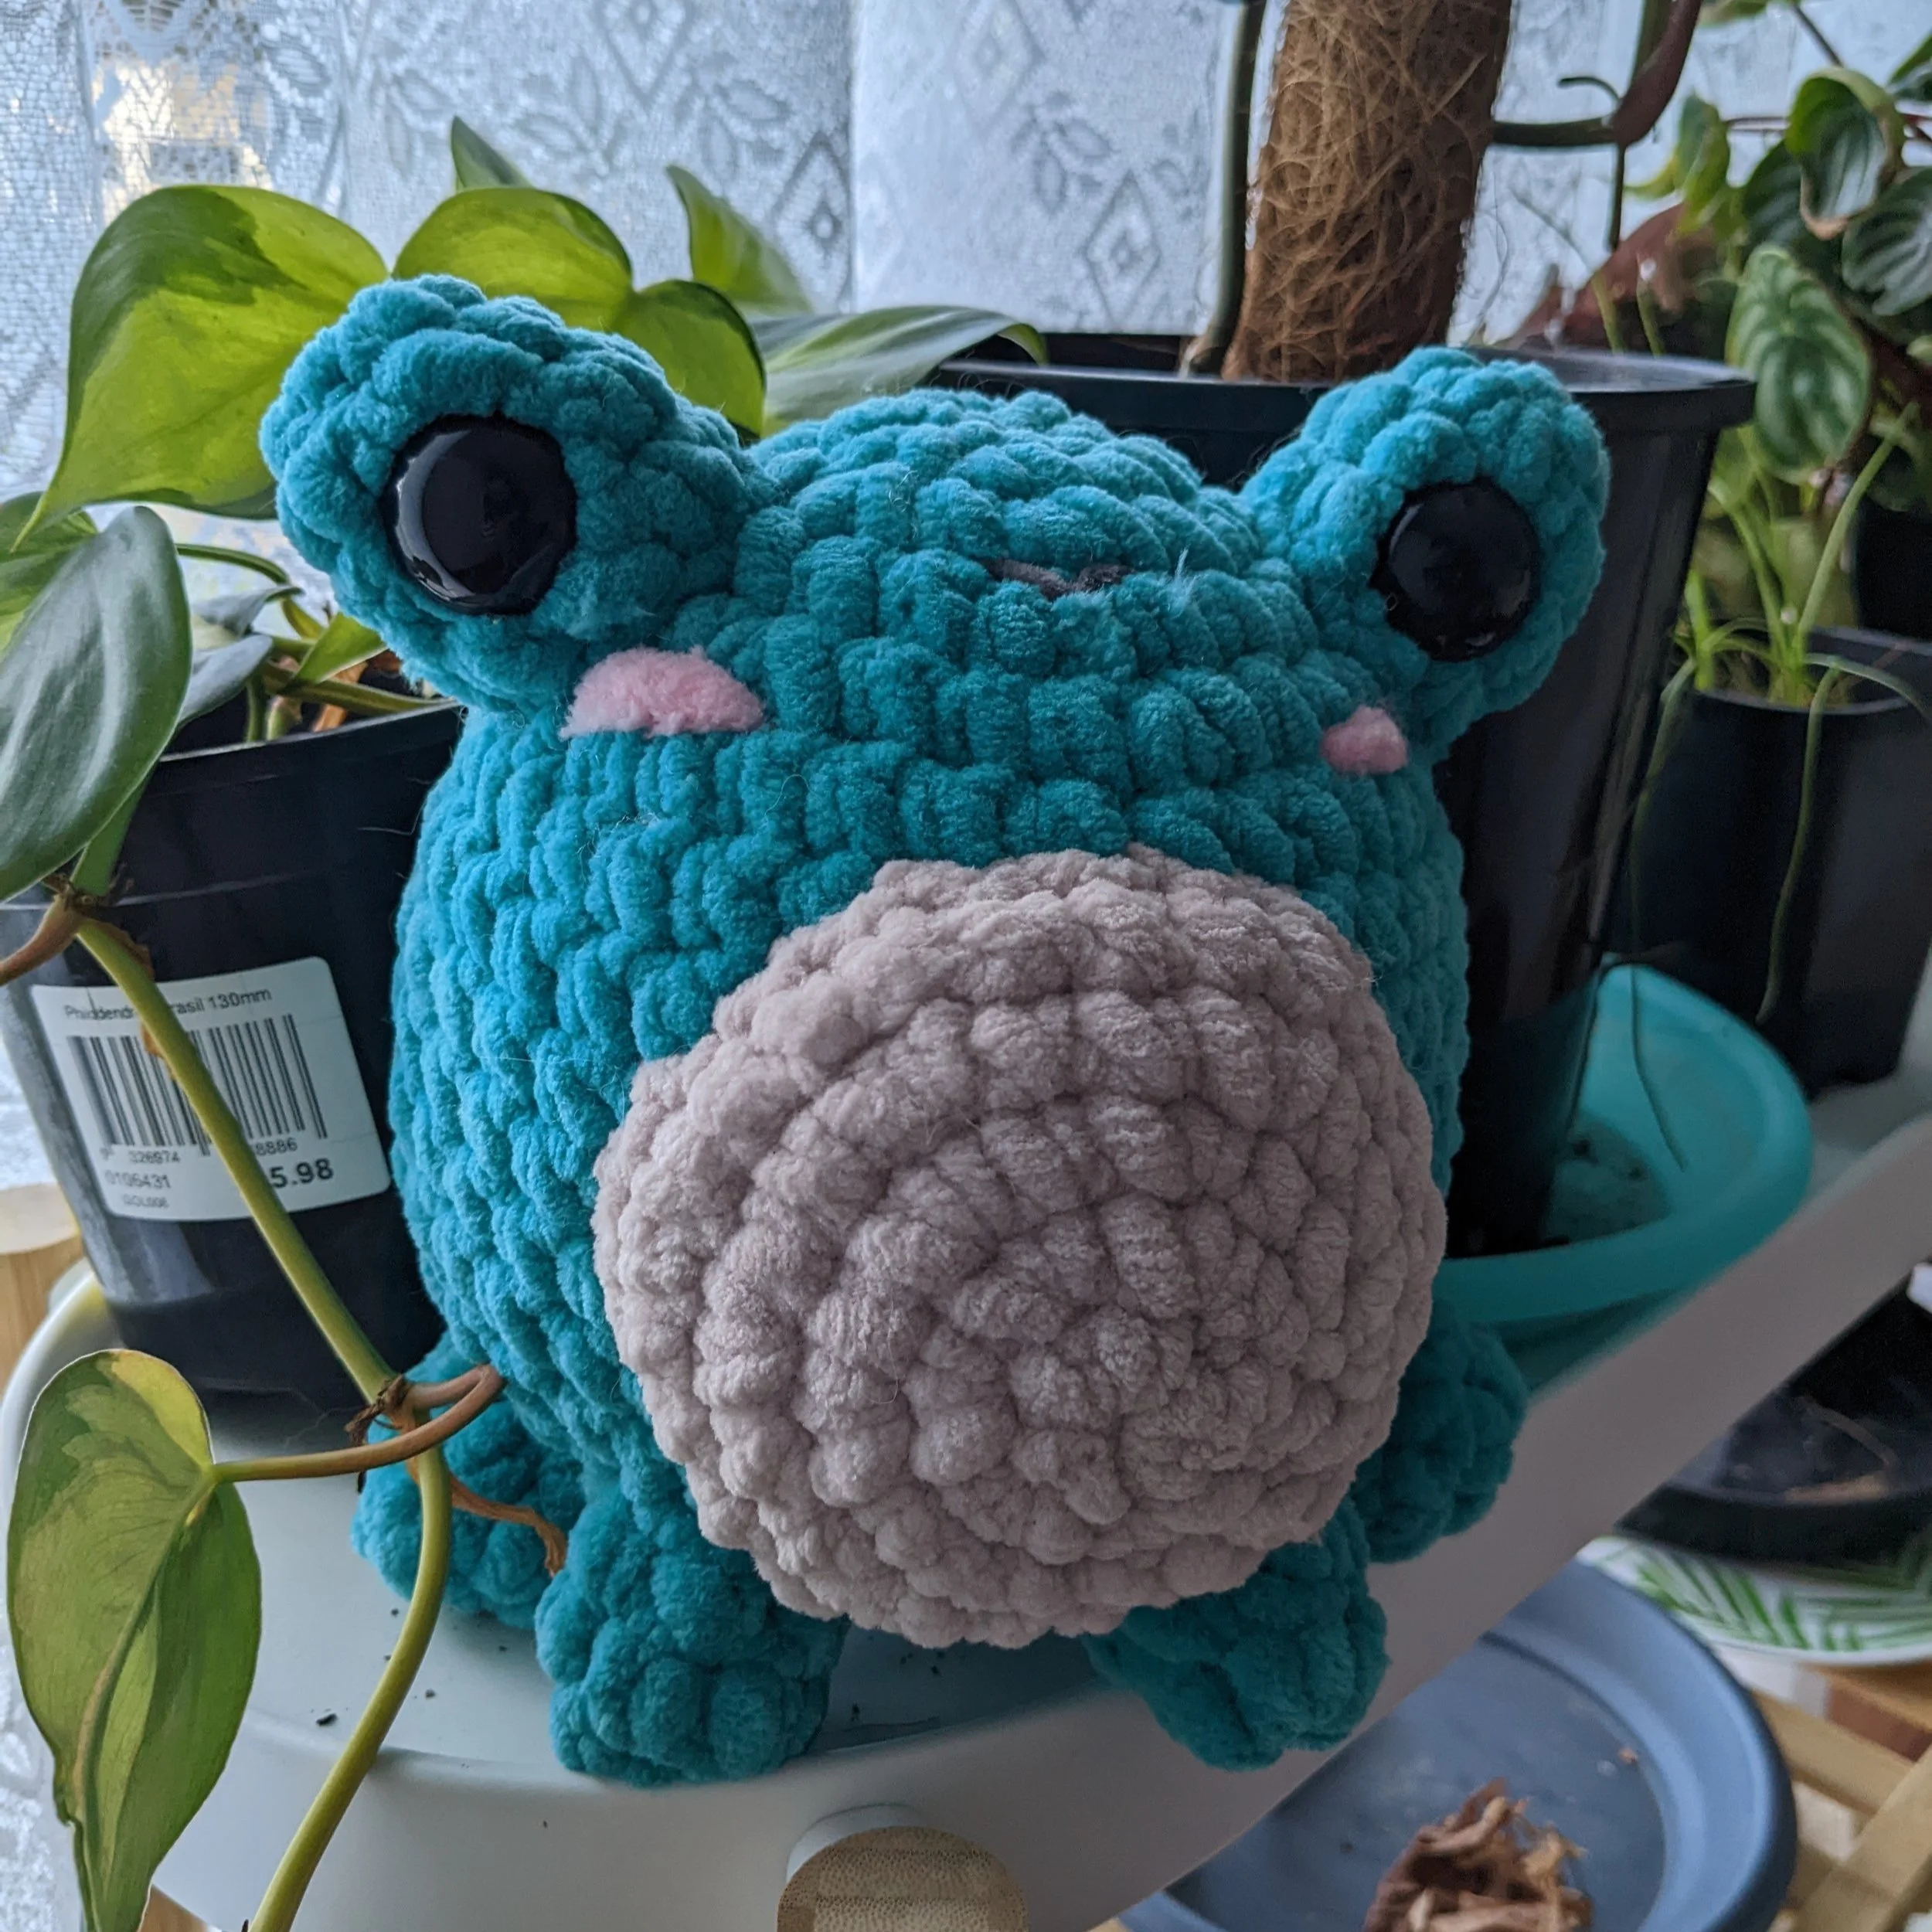
All four frogs are made with the same base pattern.
The smaller frogs are made with 8ply acrylic yarn; I personally use the Marvel brand from Spotlight stores in Australia
The larger frog is made with Himalaya dolphin BIG, and a 6.5mm hook.
An alternate may be Hobbii’s Honey Bunny BIG range, I’ve not tested that big range specifically yet but their normal honey bunny range is fantastic quality.
Safety eyes are not suitable for small children as they may pose a choking hazard, if finished product is intended for a child please do not use safety eyes here and use one of the following insted:
Using 100% Mercerised cotton in 4ply & a 1.5mm hook (a 2 - 2.5mm hook will be fine here too depending on personal preference)
Crochet 8 HDC into a Magic Ring
Crochet 2 HDC into each stitch around (16 stitches)
You can use either SC or DC for either row depending on how big you want the eyes to be. I personally like to then loop some white through some stitches to make highlights, but this is personal preference.
Felt and/or felting on eyes using a felting tool


Body
|
Row |
Instructions |
Final Stitch Count |
|
1 |
SC 6 into a Magic Ring |
(6) |
|
2 |
INC in each stitch around |
(12) |
|
3 |
(SC1, INC) x6 |
(18) |
|
4 |
(SC1, INC, SC1) x6 |
(24) |
|
5 |
(SC3, INC) x6 |
(30) |
|
6 |
(SC2, INC, SC2) x6 |
(36) |
|
7 – 13 |
SC in each stitch around |
(36) |
|
14 |
(SC2, DEC, SC2) x6 |
(30) |
|
15 |
(SC3, DEC) x6 |
(24) |
|
16 |
(SC1, DEC, SC1) x6 |
(18) |
|
17 |
(SC1, DEC) x6 |
(12) |
|
18 |
DEC around |
(6) |

Eyes
|
Row |
Instructions |
Final Stitch Count |
|
1 |
SC4 into Magic Ring |
(4) |
|
2 |
INC in each stitch around |
(8) |
|
3 - 4 |
SC in each stitch around |
(8) |

Be aware if you’re using safety eyes (like in the photo below) the backs tend to just fit, if you need additional stuffing consider using the tail from the magic ring.

Belly Patch
|
Row |
Instructions |
Final Stitch Count |
|
1 |
SC 6 into a Magic Ring |
(6) |
|
2 |
INC in each stitch around |
(12) |
|
3 |
(SC1, INC) x6 |
(18) |
|
4 |
(SC1, INC, SC1) x6 |
(24) |
|
5 |
SC18** This row is incomplete deliberately to create a slightly flatter line for the bottom of the belly patch. Leave your stitch marker in until you pin the patch in place. |
(24) |
When attaching the belly patch, your tail should be the bottom left as you’re looking at your frog, your stitch marker should be bottom right (as below)

Front feet - Make 2
|
Row |
Instructions |
Final Stitch Count |
|
1 |
SC4 into Magic Ring |
(4) |
|
2 |
(SC1, INC) x2 |
(6) |
|
3 |
SC in each stitch around |
(6) |
Don’t whip stitch these shut! Leave them open, position as in photo below


Back feet - Make 2
|
Row |
Instructions |
Final Stitch Count |
|
1 |
SC 6 into a Magic Ring |
(6) |
|
2 |
(SC1, INC) x3 |
(9) |
|
3 - 5 |
SC in each stitch around |
(9) |
Whip stitch shut across the top to flatten, attach side on as in picture below.
One foot there is attached a little wonky, I thought about redoing it but ended up leaving it, you can’t see it’s off center really when he’s standing up, imperfections like this are always absolutely fine in pieces - they make them unique.

Optional Hats
You only need minimal scraps of yarn for the hats. Do you have to give them hats? well…. no. But do they look dapper as heck in hats? Yes they do.
Crown
|
Row |
Instructions |
Final Stitch Count |
|
1 |
SC 6 into a Magic Ring |
(6) |
|
2 |
SC in each stitch around |
(6) |
|
3 |
[(Slst, HDC, DC) In one stitch, (DC, HDC) in second Stitch] x3 |
(15) |
Top Hat
|
Row |
Instructions |
Final Stitch Count |
|
1 |
Starting in black. SC 6 into a Magic Ring |
(6) |
|
2 – 3 |
SC in each stitch around |
(6) |
|
4 |
Change to red (or your hat highlight stripe colour) SC in each stitch around |
|
|
5 |
Change to black. INC in each stitch around |

Bow
|
Row |
Instructions |
Final Stitch Count |
|
1 |
Chain 4, SC into each Stitch, then around into the back/base of each stitch so you have six total stitches, in an oval – rectangle shape. |
(6) |
|
2 - 6 |
SC in each stitch around |
(6) |
|
Leave a long tail , whip stitch across the open top to close it off. Threat that tail to the middle of the top of the rectangle and wrap around the centre of the bow 4-5 times or until the centre is as thick as you want. Knot and use this tail to attach to the head. |
